BBoy Physical Training: The Ten-Layer Map
A ten-layer map for BBoy physical training, from neural recruitment and RFD to reaction, mobility, and recovery: what to train, where, and in what priority.
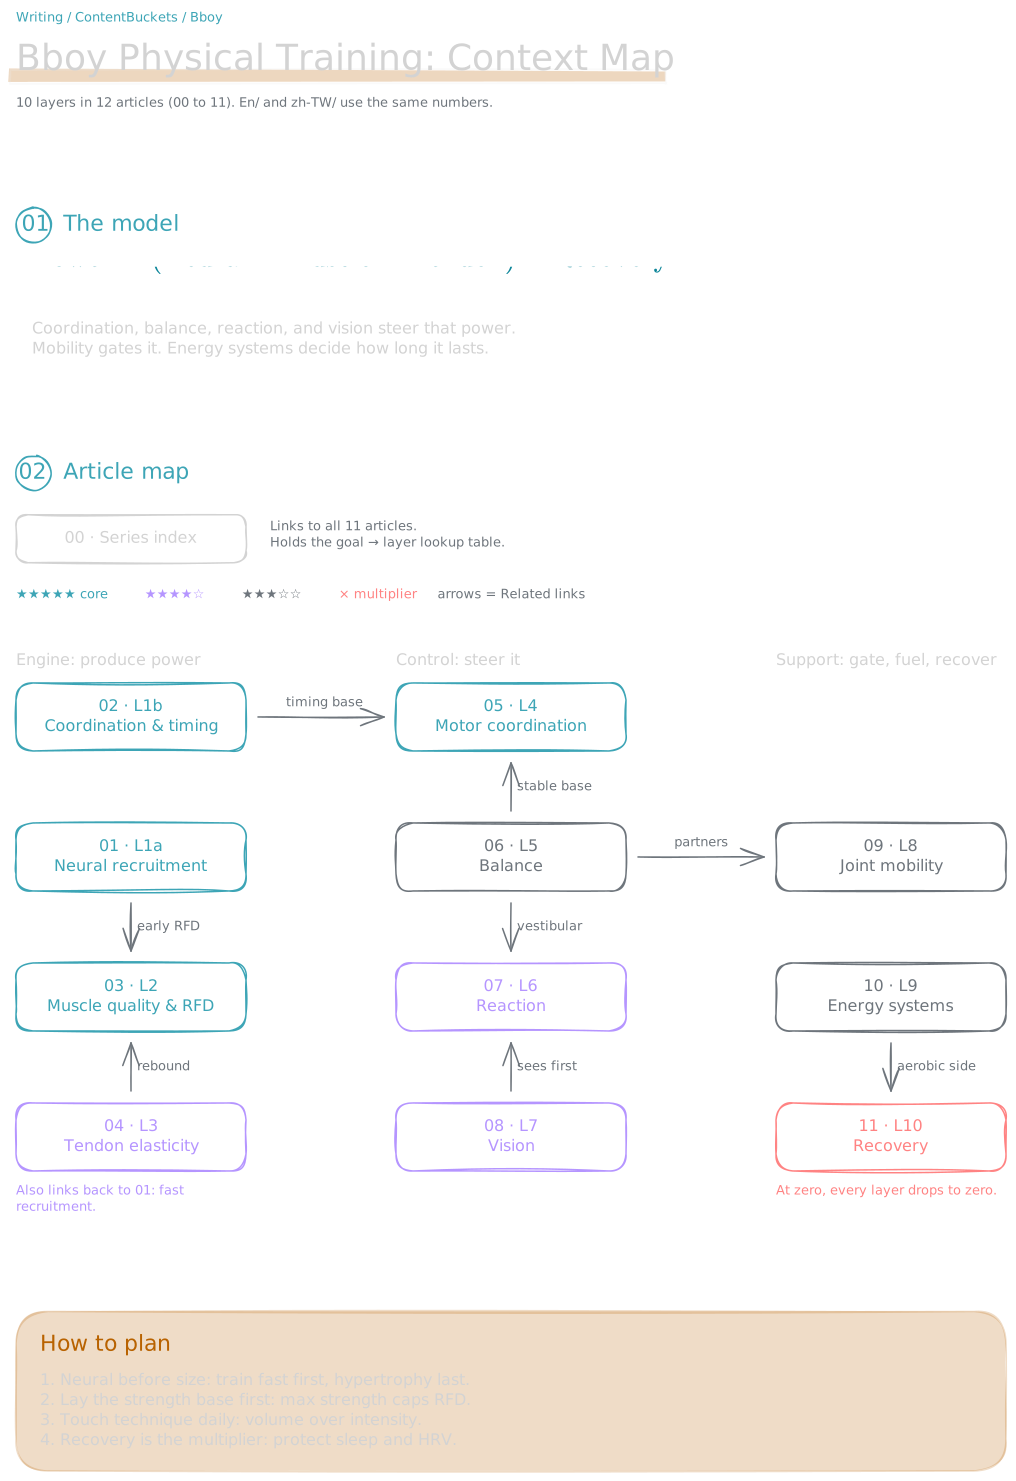
I wanted a more systematic, efficient way to raise my BBoy performance inside limited training time. So I split physical ability into ten layers, each aimed at one of three goals:
- High Power
- Fast Reaction
- High Athleticism
Every layer tells you the same four things: what to train, where (🏋️ gym / 🏠 home / 🤸 while dancing), what you gain, and how much it matters when you plan a session.
This is the overview map. Every layer has its own deep dive with drills, sets, and real movement examples. The priority table below links to each one.
Legend
🏋️ Gym (weights / equipment)|🏠 At home (bodyweight / small gear)|🤸 While dancing or training
The Map · Ten Layers
Quick glossary:
- RFD = how fast you produce force.
- proprioception = your body’s sense of where it is in space.
- ATP-PC / glycolytic / aerobic = your short / medium / long energy systems.
- HRV = a heart-rate-based recovery signal.
In a Battle · The Lifecycle
The map lists the layers. A real set fires them in a loop. Here is roughly the order they light up when you throw down:
Priority Order (read this before planning your training)
| Priority | Ability (in plain words) | Layer |
|---|---|---|
| ⭐⭐⭐⭐⭐ | Neural recruitment (how much muscle you wake) | L1a · Neural recruitment |
| ⭐⭐⭐⭐⭐ | Rate of force development, RFD (how fast) | L2 · Muscle quality / RFD |
| ⭐⭐⭐⭐⭐ | Technique / motor coordination (smoothness) | L4 · Motor coordination, L1b · Timing |
| ⭐⭐⭐⭐☆ | Tendon elasticity / plyometrics (rebound) | L3 · Tendon elasticity |
| ⭐⭐⭐⭐☆ | Max strength (the strength base) | L2 · Muscle quality / RFD |
| ⭐⭐⭐⭐☆ | Vision + reaction (see earlier, pick right) | L6 · Reaction, L7 · Vision |
| ⭐⭐⭐☆☆ | Joint mobility (usable range) | L8 · Mobility |
| ⭐⭐⭐☆☆ | Balance (stability, no dizziness) | L5 · Balance |
| ⭐⭐⭐☆☆ | Energy systems + recovery (last, bounce back) | L9 · Energy systems, L10 · Recovery |
| ⭐⭐☆☆☆ | Hypertrophy (getting bigger) → schedule last | see L2 · Muscle quality / RFD |
“I Want to Train X” → Which Layers to Hit (reverse lookup)
| I want to… | Primary layers | Support layers |
|---|---|---|
| Jump higher / bounce faster | L3 tendon, L2 RFD | L1a neural |
| Faster start / explosive init | L1a neural, L2 RFD | L3 tendon |
| Faster in-battle reaction | L6 reaction, L7 vision | L1b timing |
| Cleaner moves / fewer misses | L4 coordination, L1b | L5 balance |
| Steadier handstand / freeze | L5 balance, L8 mobility | L4 coordination |
| A full routine without gassing | L9 energy systems | L10 recovery |
| Train all day / stay injury-free | L10 recovery, L8 mobility | L9 energy |
Four Principles for Planning
- Neural > muscle size: train “fast” first (neural recruitment, RFD, plyo). Leave hypertrophy for last.
- Lay the strength base first: max strength is the ceiling for RFD, so build a squat/deadlift base first.
- Touch technique daily: coordination comes from repeated dancing, so volume > intensity.
- Recovery is a multiplier: if sleep/HRV hit zero, every layer above takes a discount.
What is Next
The map is the skeleton. The meat is in each layer’s drills, sets, and movement examples. Every layer has its own deep dive:
- L1a · Neural Recruitment Efficiency: how much muscle you wake at once.
- L1b · Neural Coordination and Timing: left-right sync and firing order.
- L2 · Muscle Quality and RFD: how fast you produce force.
- L3 · Tendon Elasticity: rubber-band energy return.
- L4 · Motor Coordination: drill the technique until it runs itself.
- L5 · Balance: proprioception and the vestibular system.
- L6 · Reaction: battle-type choice reaction.
- L7 · Vision: see it earlier.
- L8 · Mobility: hip, ankle, and T-spine range you can use.
- L9 · Energy Systems: how long you last.
- L10 · Recovery: sleep, HRV, and nutrition as the multiplier.
If you only read one, start with L1a.